
Did you know that, unlike night vision optics, you can sight in a thermal scope during the day? That’s because the electronics that are utilized in thermal actually work during the day and the night as it doesn’t depend on visible light, but heat.
So, no need to make an adjustment to your target so you can sight in with your optic during the day. All you need is a heat source to zero in on.
This guide for sighting in a thermal imaging scope on your weapon includes tips for some of the most popular manufacturers. The guide also contains terms you need to know, suggestions for targets, and best of all, tips on how to save ammo and money when sighting the scope.
Contents
- The Terms You’ll Need to Know
- What Distance Do You Sight in a Thermal Scope?
- What You Need to Sight In a Thermal Scope
- What Kind of Target Should You Use for Sighting in a Thermal Scope?
- How to Sight in a Thermal Scope During the Day
- How to Sight In a Pulsar Thermal Scope
- How to Sight in an ATN Thermal Scope
- How to Mount a Thermal Scope
- More On Thermal Scopes
- Frequently Asked Questions
- References
The Terms You’ll Need to Know
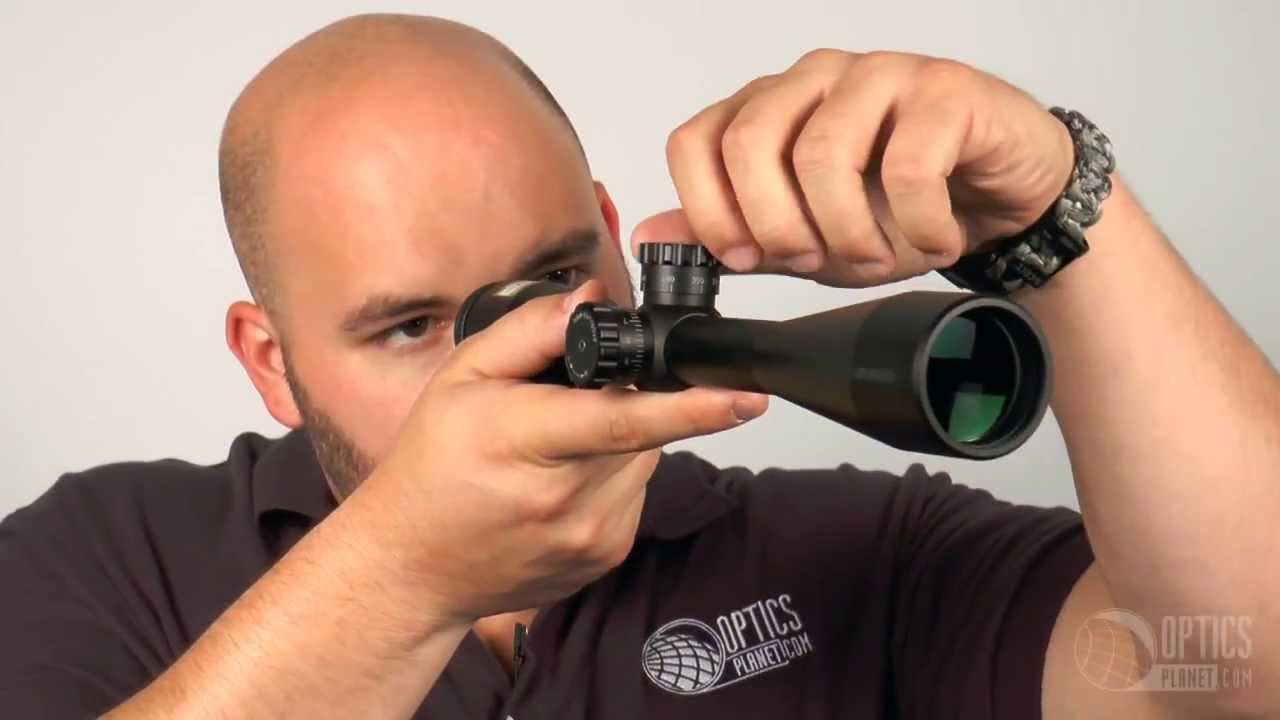
Ambidextrous scope for easy sighting in with either hand
Before we get deep into sighting in your thermal imaging scope, we need to get some terms out of the way. Knowing these terms will greatly help in understanding how to sight in a thermal scope and create a basis of knowledge for scopes in general.
Click
A click, also known as click value, is one unit of change using the scopes sight adjustment turrets. It gets its name from traditional scopes that made an audible click with each slight turn of the knob.
In most hunting scopes, one click is equal to ¼ MOA (we’ll get into this later).
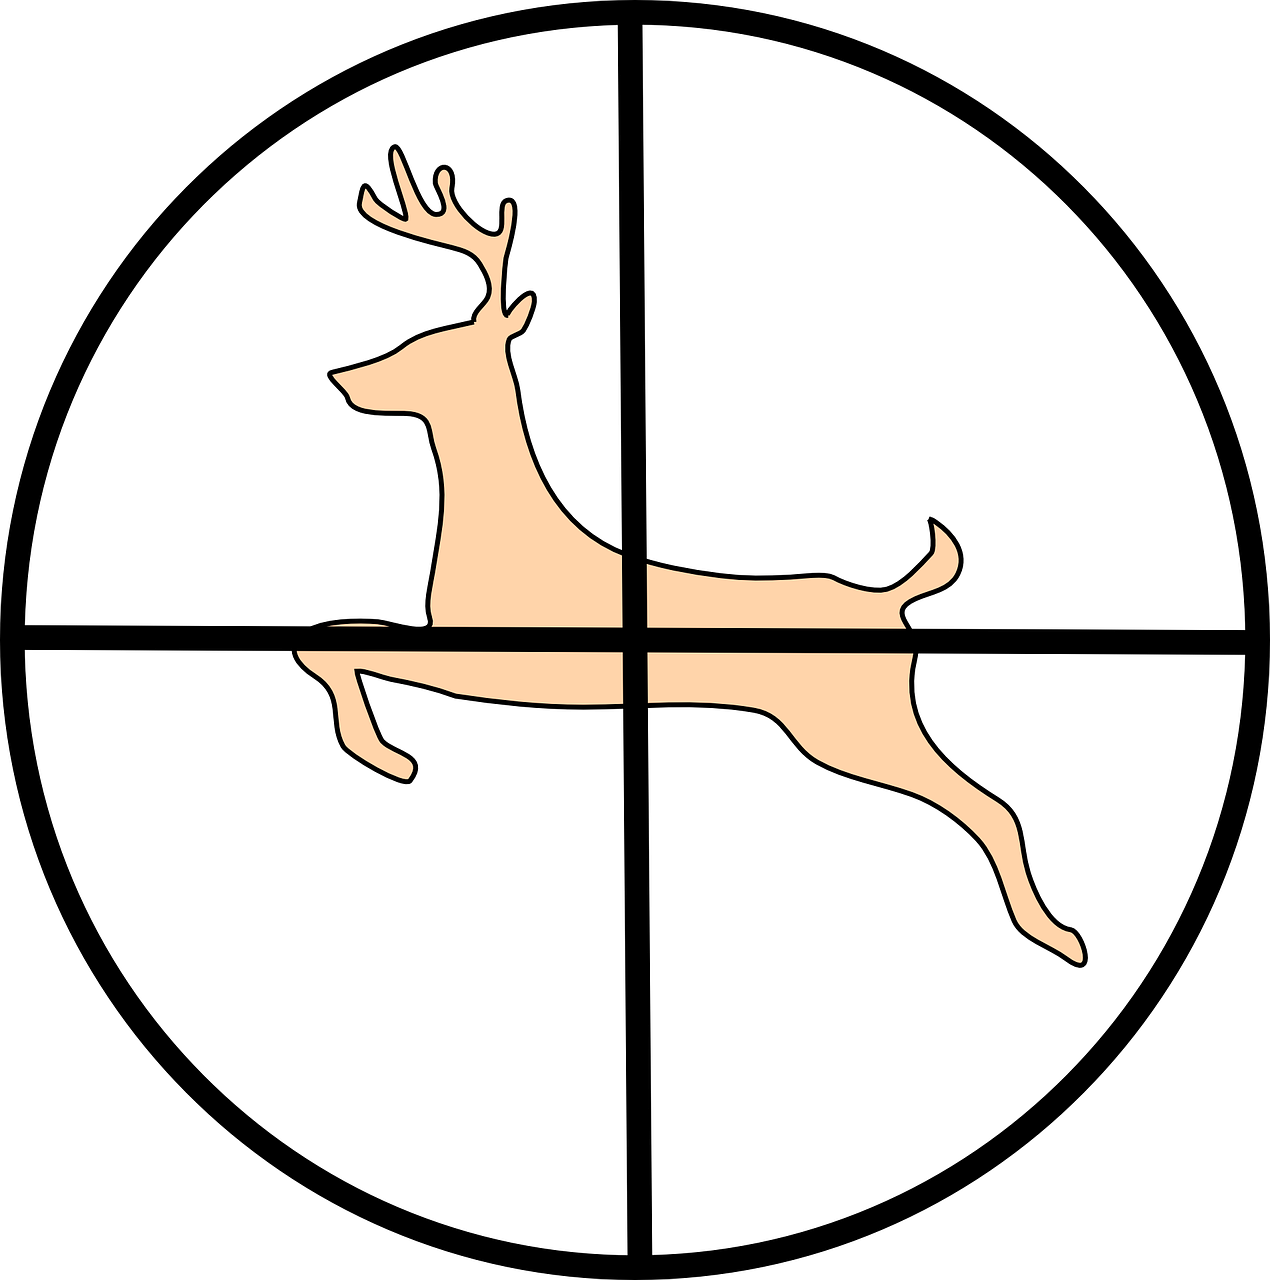
Reticle
The reticle is the sight inside the scope. Zeroing the reticle means the center of it is where your bullet hits.
And knowing how to sight in a thermal scope means understanding the reticles. It comes in three different configurations. All are good, all have the best use, and all have strengths and weaknesses.
Plain
A plain reticle is the two lines found inside a scope, and it actually has a bunch of different subtypes, which are pictured below. However, zeroing is the same for all reticles.
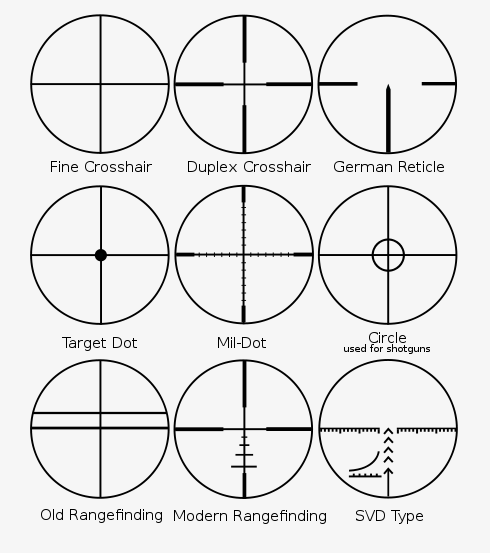
Different types of reticles.
Dot
A dot reticle is just that, a dot. It is most common in red dot and reflex scopes. It can be just a dot, a dot inside a circle, a series of dots, a triangle, or a set of floating lines with a dot in the middle.
A few companies make thermal imaging red dot scopes, but Steiner is the only company that makes a reliable one.
Some thermal red dots are available as house brand scopes from China. Buy one of those at your own risk though as they’re not tested like Steiner and don’t have the same quality controls in manufacturing.
Christmas Tree
A Christmas Tree has vertical and horizontal lines, and the bottom half of the reticle display more of these lines. The vertical lines are usually short dashes, and the horizontal lines get longer as they reach the bottom.
The effect looks like a tree, hence the nickname.
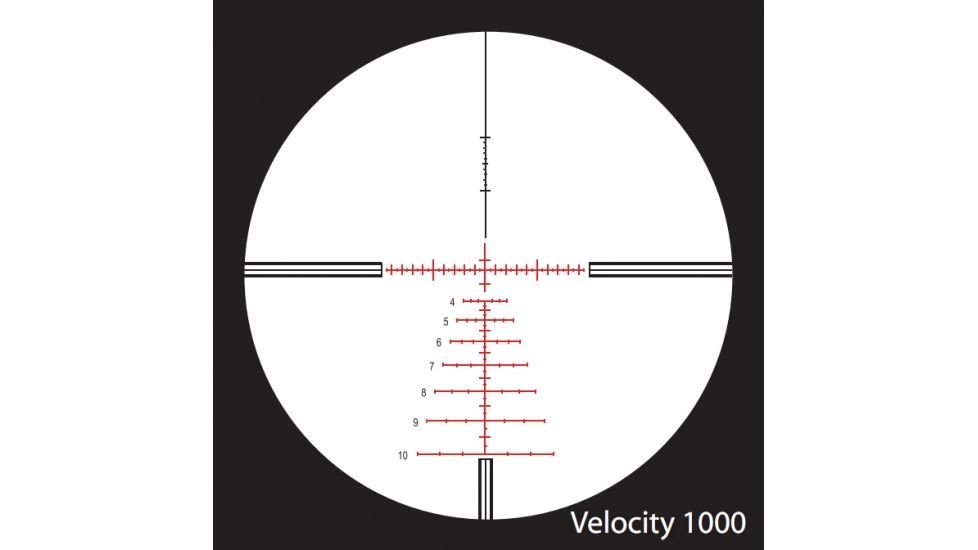
The spaces between all the lines are measured in MOA or MRADs. When you learn what they are and how to use them, you can shoot precisely at long range.
Sighting in your scope with this reticle also means learning how to use the Christmas tree when shooting at a distance and with wind.
In fact, a hunter can make immediate adjustments for a shot just by reading the Christmas tree.
MOA
MOA stands for Minute of Angle. For gun scope needs, this is 1″ per 100 yards. The actual measurement is 1.047 inches at 100 yards.
This is important because a scope’s reticle moves in MOA (or MRAD) increments. Usual measurements are ¼ MOA, but it can be as high as 1 MOA and as small as ⅛ MOA.
Also, red dots are measured in MOA. The most common dot size is 2 MOA, but it can be 1 to 6 MOA across.
Generally, MOA is the most common measurement for gun scopes.
MRAD
MRAD is the abbreviation for milliradians. It is also abbreviated as MIL.
A MIL is 3.6 inches at 100 yards. Scope measurements are done in fractions of a MIL, with the most common being 1/10th of a MIL.
Now, MRAD is more common in long-range and sniper-style scopes.
In terms of shooting and sighting in, the only real difference between Mil/MRAD and MOA is the shooter’s preference.
Elevation
Elevation indicates directions up and down as seen through the scope. If the bullet hits above the point you aim at, the elevation is too high. If the bullet hits below where you aim, the elevation is too low.
Windage
Windage, on the other hand, indicates directions left and right. If the bullet hits to the left, you’ll need to change the windage to the right. If the bullet hits the right, adjust the windage to the left.
What Distance Do You Sight in a Thermal Scope?
The distance needed to sight in is actually the most common question people ask…
Ron Spomer has the perfect answer. “The distance that gives you the most flexibility for putting your bullet on target quickly with minimum measuring, guessing, hoping, or missing. And that’s rarely 100 yards,” he says (1).
Start Close
Knowing how to sight in a thermal scope starts with being close.
Take your first shot at 15-25 yards. This will let you get on the target and make some rough adjustments. You won’t search for the bullet hole.
We have literally shot rifles with a scope that missed 2-foot targets at 20 yards and had to take the scope off and use a scope mounting kit to get the rings trued.
After that, start backing off. At each step along the way, check the windage first. Then check elevation.
Windage is more important because the elevation changes with distance.
Pay attention to the bullet’s impact and elevation as you move back. When you get to the optimal range for your gun, then note the bullet impact at shorter ranges.
The bullet will be high. This distance between the zero on the target and the bullet impact is called holdover.
Adjustments
Your scope adjusts the reticle up and down as well as left and right. It can be done through the turrets or knobs on the scope or with the buttons on the control box of many thermal scopes.
Shoot
You have to shoot to sight in a thermal scope. If you get lucky (or have an ATN), you can do it with a few shots. Depending on how much you are off-center, you may need to shoot up to a box of ammo.
Reach Out
As a hunter, at this point, you have a choice.
- Stay with the zero as you have it and don’t shoot anything much past that.
- Shoot farther, without changing the zero, to see how much the bullet drops. If you shoot past the sighted-in distance, you will need to learn the holdover for various distances.
Bullets Matter
This is important. The bullet grain matters a lot when choosing the distance to sight in your scope because of the trajectory.
Distance matters because bullets travel in an arced trajectory. One of the best examples of this is in the 300 Blackout.
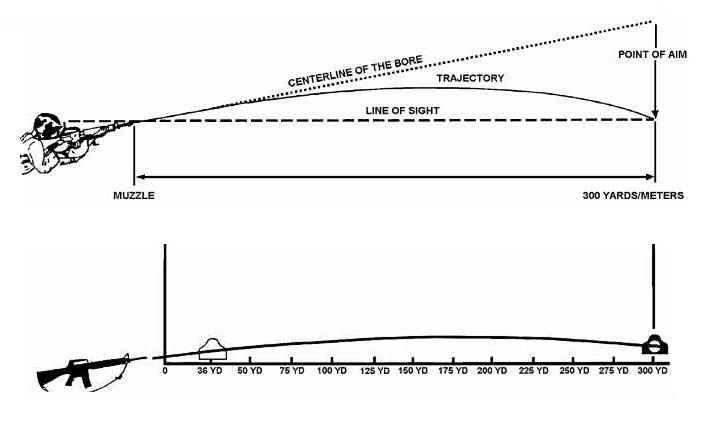
Source: http://ffden-2.phys.uaf.edu/
This cartridge can shoot rounds ranging from 110 grains up to massive (relatively speaking) 220-grain rounds that are subsonic.
Use the chart below to see the difference in bullet drop over 100 yards for the 300 Blackout and other ammo. Run a few different loads and you’ll see why where you sight in matters.
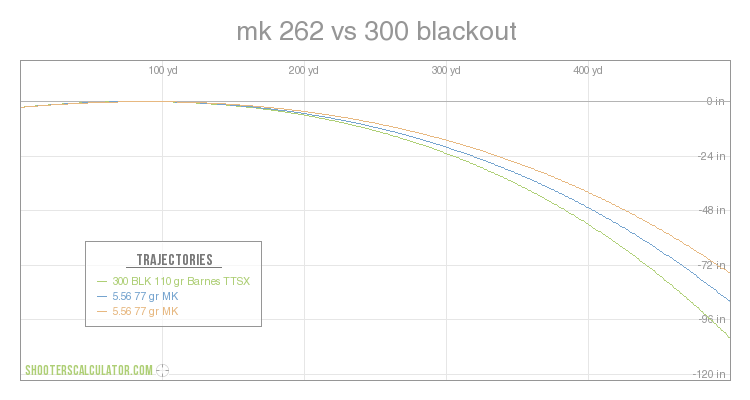
Source: shooterscalculator.com
Let’s make this practical so you know how to sight in a thermal scope.
Sight in your 300 Blackout at 100 yards with 220-grain subsonic rounds. You are dead on at around 18 yards, about 2.75 inches high at 58 yards (the top of the trajectory), and dead on at 100 yards.
Switch to 125 grains rounds. With a 100-yard zero, the 300 Blackout is dead on around 68 yards and 1.5” low at 18 yards.
What You Need to Sight In a Thermal Scope
The things you need to sight in a thermal scope are:
- Ammo – practice and hunting rounds
- A safe place to shoot like an approved range
- A bore sighter (optional)
- A heating source or foil
Be sure to match your scope to the gun and vice versa. If you have a gun capable of shooting 500 yards, you need a scope with a magnification level that lets you see that far. You also need a scope that is designed to handle the recoil your gun has.
Ammo
Most people get two kinds of rounds. They get range ammo for just shooting (plinking) and then they have their precision and hunting ammo.
A good example of this is an Everyday Carry (EDC) weapon. Most people carry hollow points (HP) in their EDC. When they go to a range to practice, they shoot full metal jacket (FMJ or hardball).
HP is more expensive than hardball. In handguns, the performance difference is negligible for practice work. But in self-defense, there is a major difference.
The same applies to your hunting rifle. Use cheap rounds to shoot to learn your rifle and get mostly sighted in. Then, switch to the hunting rifle ammo to fine-tune the scope’s adjustments.
IMPORTANT! If you change ammo, you need to check the zero on your scope.
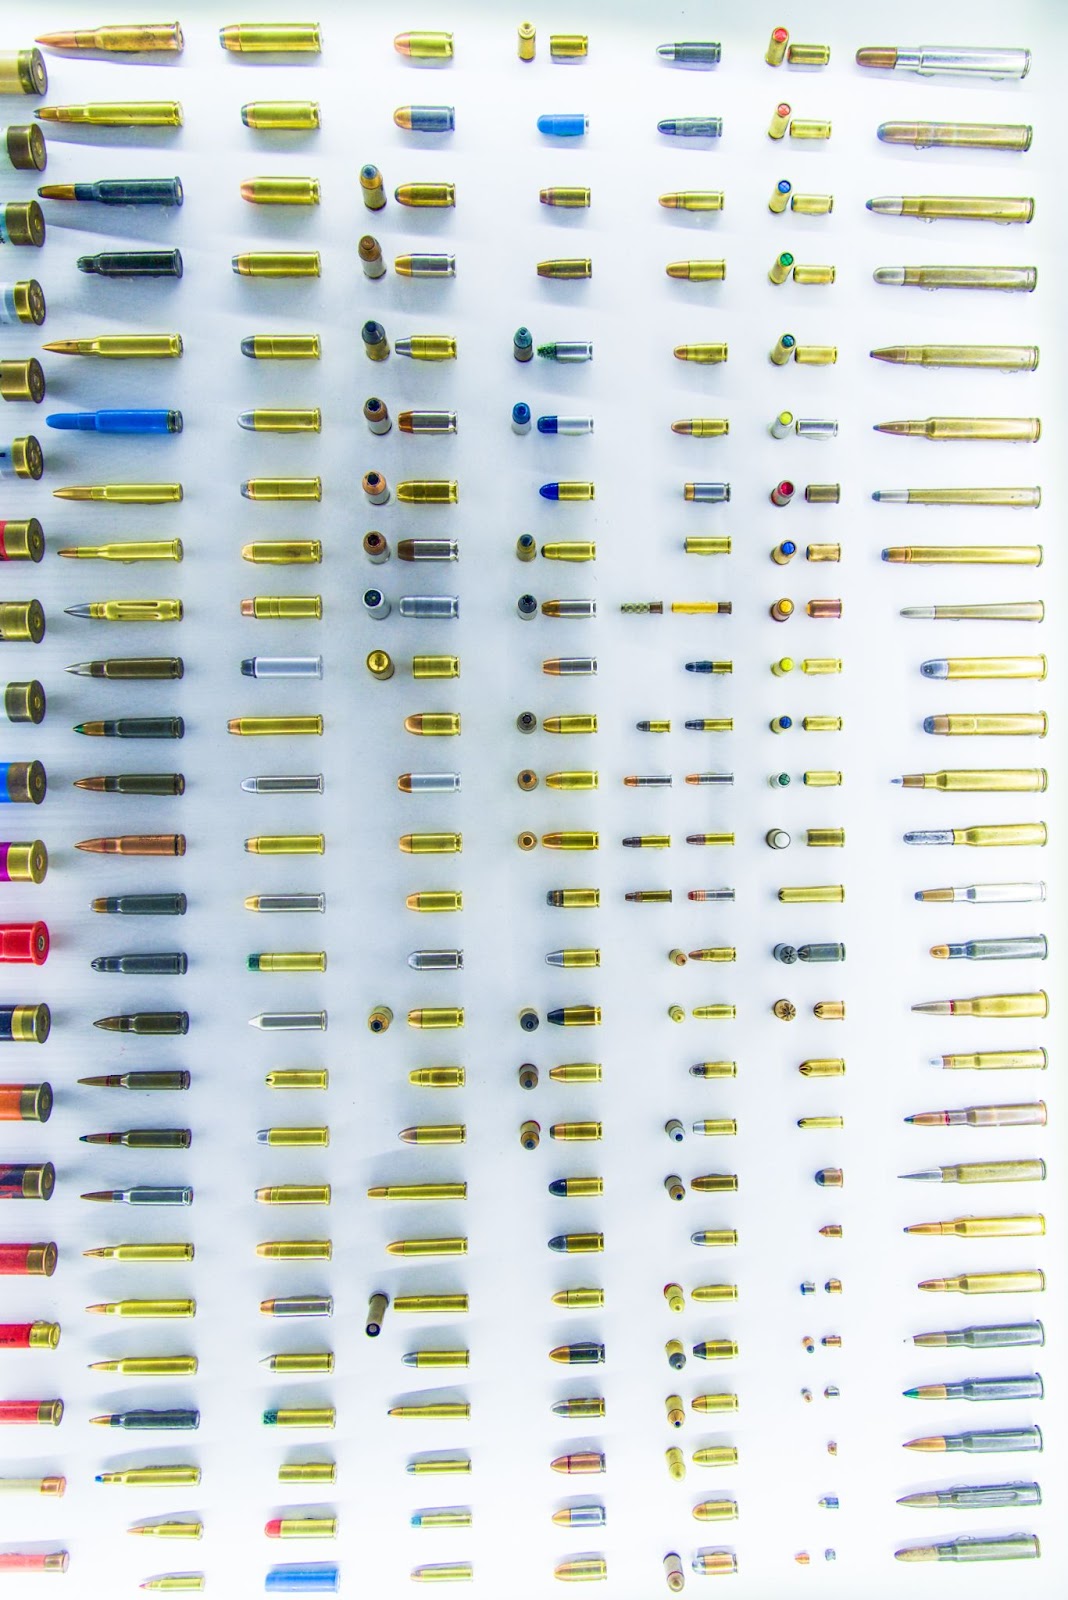
Different grain weights will perform differently. Different manufacturers’ ammo will perform differently. The same ammo will perform differently in different guns. The bullet will contact the target in different places.
Bottom line, remember to re-zero.
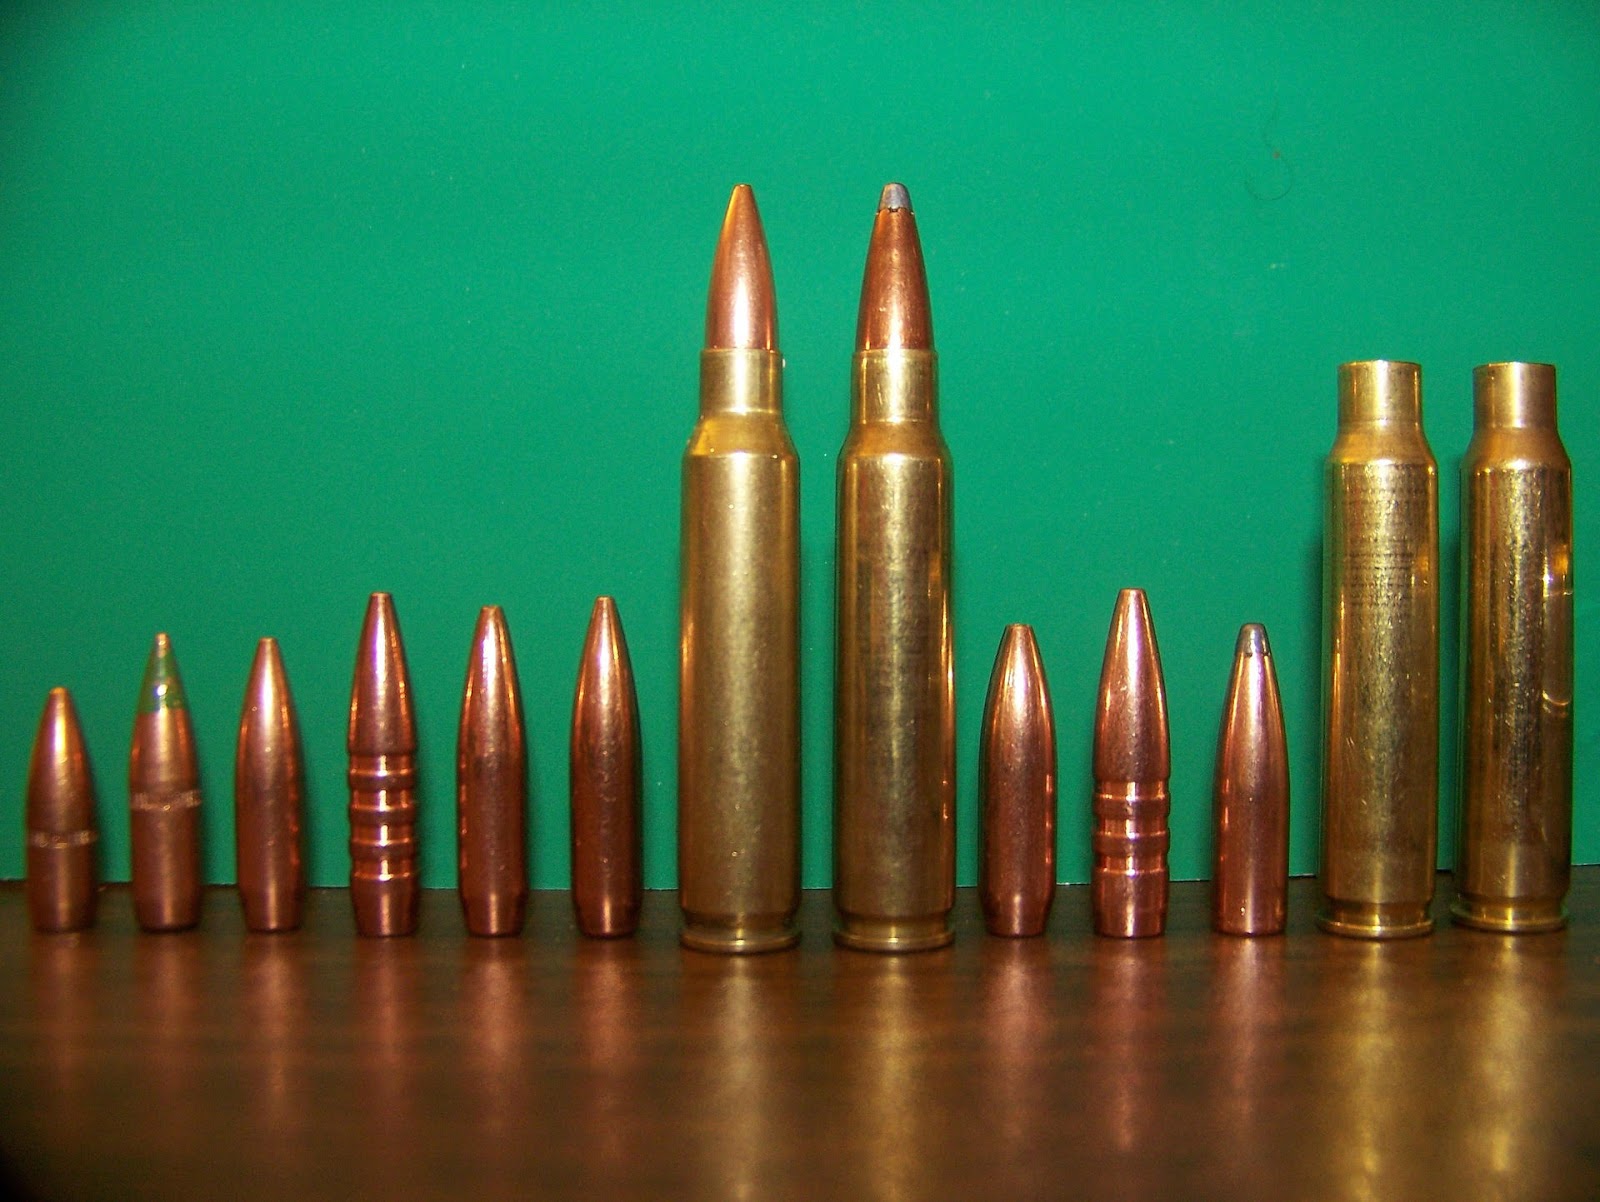
In this image, the rifle cartridge is the same. Each bullet shown is a different grain and different type, so each will shoot a bit differently than the others.
Here’s an example of the ballistics statistics for the very popular 30-06 Springfield.
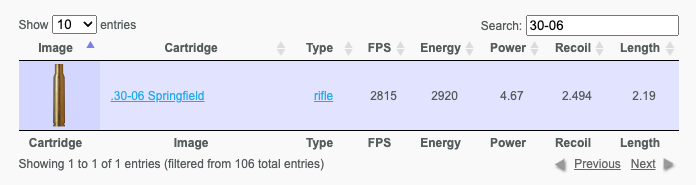
Source: http://gundata.org/
Range
Professional ranges already have distances marked off. This means you won’t have to measure the distance from where you shoot to the targets when you sight in a thermal scope.
Ranges are set up to be safe. They have piles of dirt and berms to stop bullets, and many have frames to hang targets.
Professional ranges also have plenty of space behind the berm. This is a safety factor.
You should always know what is behind your targets. If it isn’t safe, do not shoot.
Bore Sighter
A bore sighter helps you get the reticle close to centered. However, you still need to shoot to get zeroed. They will either have crosshairs or a laser, and they’re not digital.
It’s not necessary, but it does help.
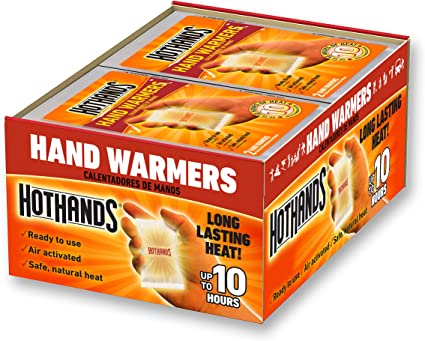
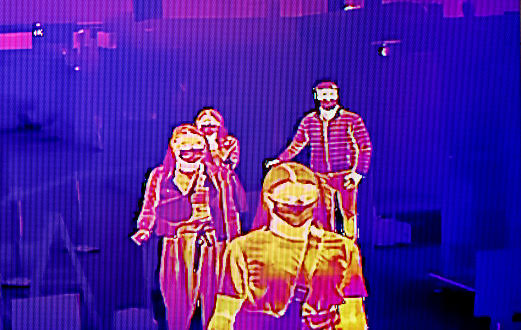
Heat
Thermals look for the infrared radiation (heat) coming off your targets. Since your targets are likely at ambient temperature, you need something to heat, or cool, the targets so you can clearly see them on the screen.
Small hand warmers are ideal for this.
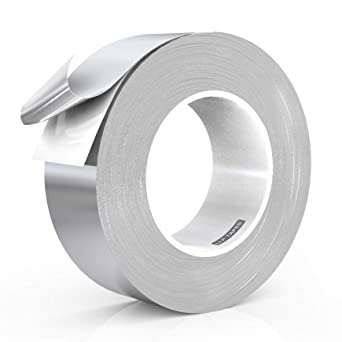
You can also tape small patches of foil to the target. Reflective foil tape works well too as they reflect heat, creating a cooler area, so zeroing in becomes easier.
What Kind of Target Should You Use for Sighting in a Thermal Scope?
You can use any kind of target when sighting in a thermal scope. A target is just something you use to see where the bullet hits. If you’re an excellent shot, you can sight your scope in with a target that shows the bullet hole and also does not move. Reflective tape can also hold targets down
It needs to show the hole so you know where the bullet impacted. With that information, you’ll know to adjust elevation up or down and windage left or right.
Additionally, the targets have to stay put because if they move, all your points of reference move too.
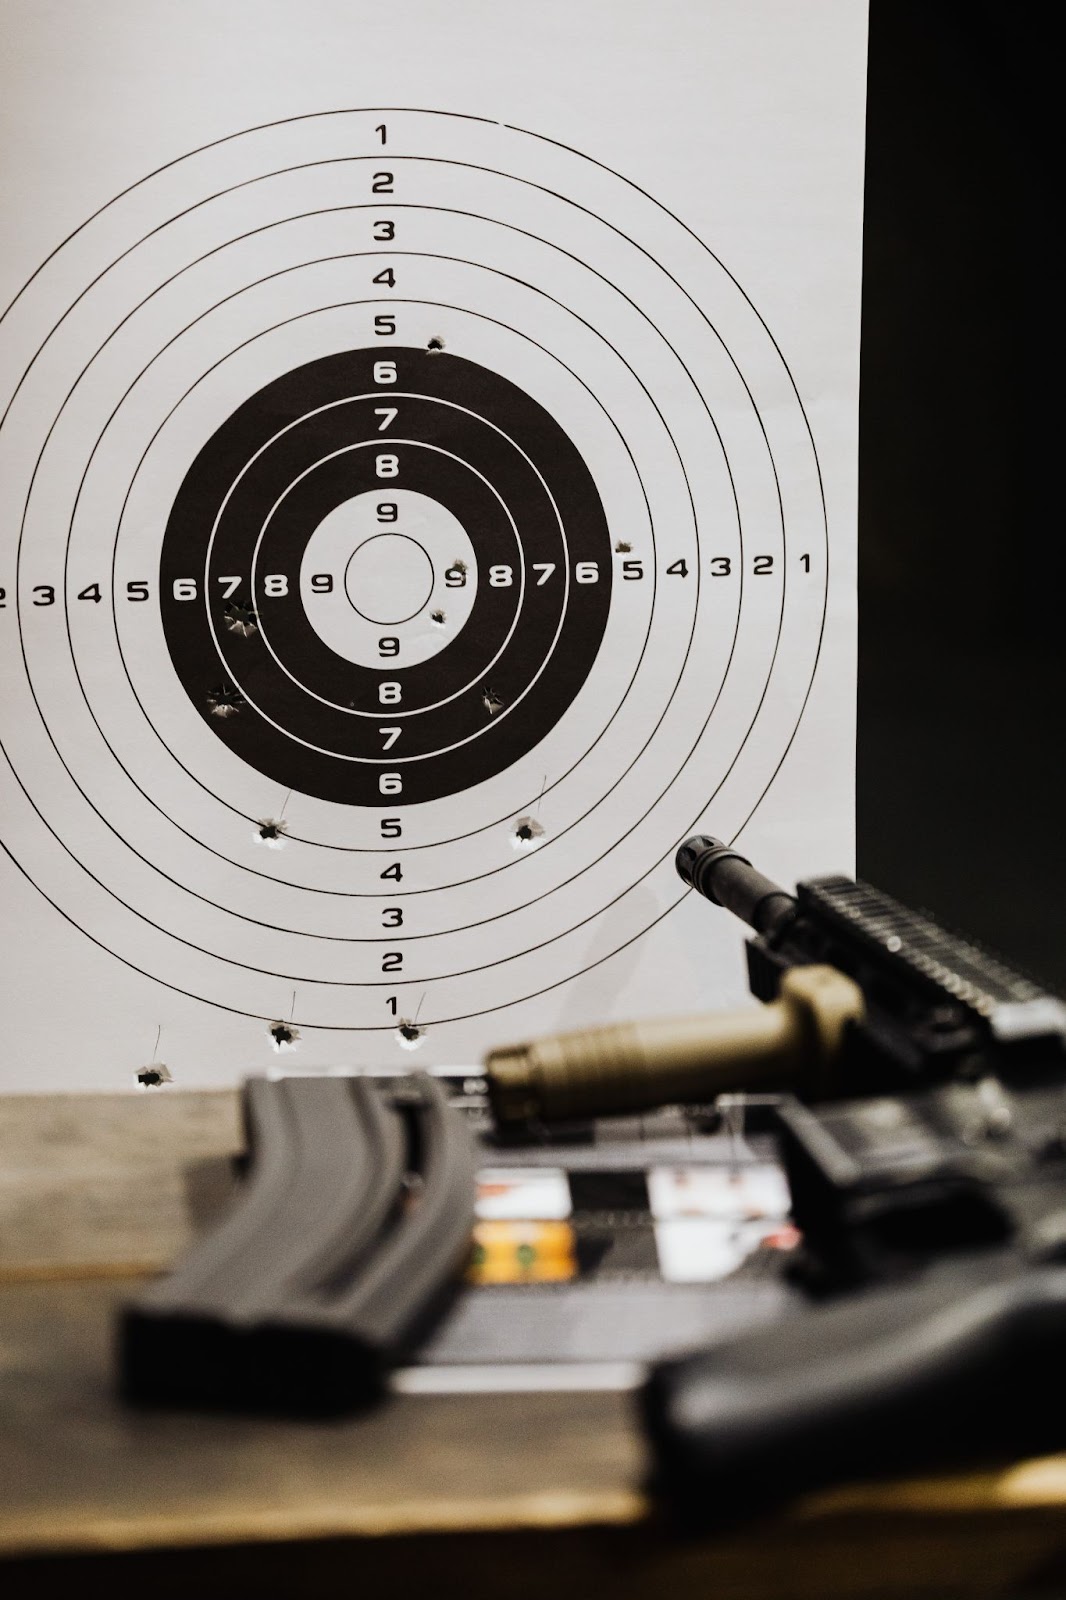
Crosshair & Square
The best dedicated rifle targets to use to sight in have crosshairs and are covered in 1” squares.
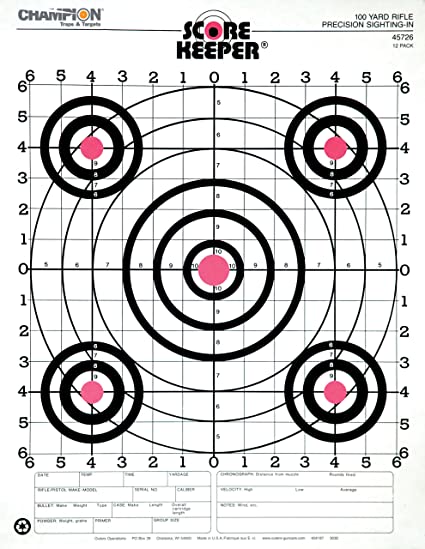
This rifle target has 1” squares, crosshairs, and bullseyes.
Here’s a scenario for a better idea. Imagine shooting at the dead middle of this target at 50 yards. According to the squares, your rifle bullet hits 1 inch high and 2 inches to the right.
If your rifle scope has ¼ MOA adjustments, you need to adjust the reticle 2 clicks down and 4 clicks left. Remember, the typical scope click value is ¼ MOA or ¼ of an inch at 100 yards. So at 50 yards, each click is ½ inch. At 25 yards, each click is 1 inch.
These are most common for sighting in and practice shooting because those squares let you make exact adjustments.
Bullseye Target
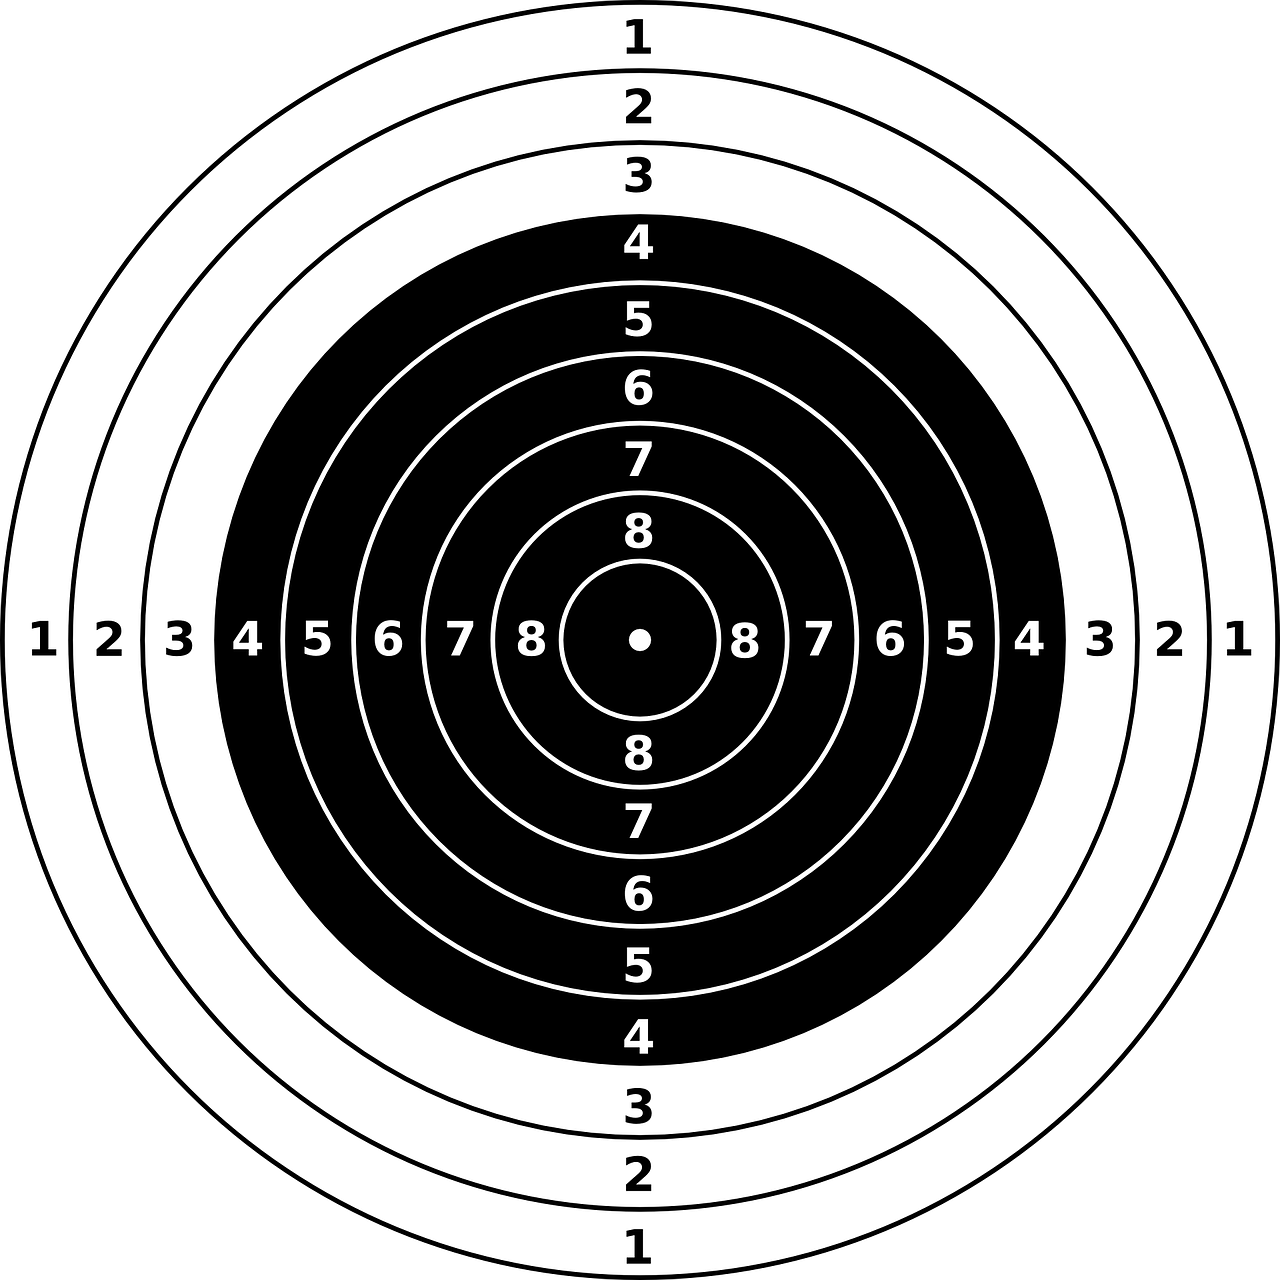
Bullseye rifle targets have rings and are most common in tournaments. The distance between the rings is a known amount. If you pay attention and shoot at 100 yards, then you know exactly how many clicks to move the reticle.
Speaking as hunters, we say both targets are good.
Thermal Target
Turns out, some companies are now offering a thermal target.

Be aware that these targets will shoot to pieces just as fast as other paper and cardboard targets.
How to Sight in a Thermal Scope During the Day
The critical part of sighting in a thermal scope during the day is having a target to see and easily finding an aim point on the target. The aim point can be a dot, crossed lines, or something else.
This is where the scope’s sensors and the view come in.
The View
The main difference between sighting in a regular scope and a thermal scope during the day is the view – what you see through the scope.
A regular scope shows you what is downrange as seen in ambient light.
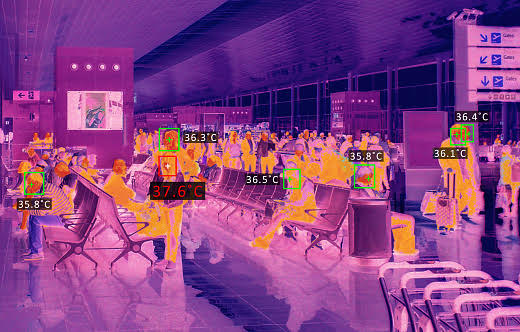
The thermal scope shows you heat sources downrange. The best scopes can pick up very subtle differences.
Sensors
The thermal scope’s view is dependent on the sensors. Higher-quality sensors give you a better picture than cheap sensors.
So how do you find out a senor’s quality?
The easiest way is to look at the detection range. A longer detection range means better electronics on the inside of the scope. You can also look at sample images taken with the scope.
So, keep this in mind: cheap thermal scopes don’t provide a lot of image detail. Seeing the target becomes a harder task with cheap scopes.
Marking the Target
If you can’t see an aim point on the target, you must figure out a way of marking the target. You’ll need something hotter or colder than the target. A good thermal scope will pick up either one.
Chemical hand warmers like HotHands heating pads can give you a hot spot on the target to see on the scope’s screen. If it’s a paper target, you can set up a heat source behind the paper.
Your problem here is setting up a heat source that:
- Won’t set fire to the target
- Is safe to use on the range
- Won’t matter if it gets shot
Now, when you’re set up at the shooting range, take the first shot. See where the projectile hits.
Find the elevation and the windage controls. Start moving the crosshair up or down and left or right to walk the crosshairs into the right place. This may take you several shots.
PRO TIP – Use the recording feature in the scope to shoot videos. Watch them later to see how well you shoot and what changes you can make to be a better shot.
How to Sight In a Pulsar Thermal Scope
Sighting in a Pulsar thermal scope is the exact same as any other thermal scope. Everything mentioned above is information to help you sight in your Pulsar rifle scope. The method is the same for the Pulsar as any traditional scope.
Pulsars either have turrets – as seen above – or buttons on the electronics housing unit.
How to Sight in an ATN Thermal Scope
Of all the thermal scopes, ATN has the easiest sight in process.
- Aim at the target.
- Shoot.
- Use the scope’s controls to get to the screen showing where the projectile hit.
- Adjust the reticle until it covers the impact
ATN provided a very useful video to show you how to use this one-shot sight in.
This process is so fast and easy that a hunter can literally switch the scope to a different gun while hunting. You just need a safe place to shoot once with the scope to pick up the bullet’s impact.
How to Mount a Thermal Scope
In order to property sight in a thermal scope, it needs to first have been mounted correctly. For this, check out our full guide on how to mount a thermal scope where we go over everything you need to know.
More On Thermal Scopes
Now that you know how to sight your scope, we would highly suggest you take a look at our article on the best thermal scope for the money. We do a deep dive on the top optics you can buy to ensure that you’re getting the perfect scope for your needs.
Frequently Asked Questions
Do you have to sight in a thermal scope?
Yes you have to sight in a thermal scope. Every time you take the device off and put it on a gun, you have to check the zero and sight it in. If you just loosen the rings (if it mounts with rings) to move the scope on the gun, you have to check the zero.
Can you see a red dot through thermal scope?
No, you can not see a red dot through a thermal scope. The red dot on the glass in the scope can’t be seen if you put the thermal in front of the red dot scope. If you put the thermal behind the red dot, you can see the dot, but your sight picture in the thermal will be horrible.
True red dot thermal scopes are quite rare. Steiner eOptics is an example of one.
Can you sight in a thermal scope during the day?
Yes, you can sight in a thermal scope during the day as it can also operate in the daytime.
You may have to find a way to create a heat source on the target to create a point of aim.
Chemical hand warmers like the Hot Hands heating pads can be taped to the back of the target, and that will provide enough heat for the scope to pick it up.
With a good resolution in the thermal sensor, you can see enough of the target to sight your scope in during the day.
Can you shoot a thermal scope during the day?
Yes you can shoot a thermal scope during the day. Thermal scopes can be used during the day as it picks up heat sources in the infrared range. Daylight does not affect the device.
Just DO NOT point the scope at the sun. That will damage it. True night vision scopes will burn out if used during the day.
Traditional night vision scopes cannot be used during the day because the ambient light will damage the sensor.
How long does a thermal scope last?
With proper care and use, a good thermal scope will last thousands of hours. The internal sensors will eventually wear out and the scope will have to be replaced. In thermal hunting forums, some hunters report getting more than 10 years of use from their scopes.
Protip: Try to buy a thermal with replaceable batteries as the battery will die before the internal electronics.
Can I use a laser boresighter to sight in my thermal scope?
Yes, you can use a laser boresighter to sight in thermal scopes. It’s useful for getting close to zero, but you’ll still need to shoot to get the scope spot on. The boresighter gets you close.
The boresighter can set windage very accurately, but elevation has to be checked when you shoot.
What is sighting in a thermal scope?
Sighting in a thermal scope means setting the reticle so the bullet hits the point covered by the center of the reticle.
You look through the scope. You place the center of the crosshairs (reticle) where you want the bullet to hit. Then you shoot.
If the bullet does not hit that point on the target, you adjust the reticle up or down (elevation) and left or right (windage) with the scope’s controls.
References
- Ron Spomer, “What’s the Best Distance to Zero A Hunting Rifle?”, Retrieved from: https://www.outdoorlife.com/story/guns/whats-the-best-distance-to-zero-a-hunting-rifle/
I have been writing firearms and outdoor material for over 50 years to date. I have hunted across the world, including Russia, and a great deal of time professional hunting in Australia. I currently live in the American West and hunt all across the Black Hills of South Dakota and the Big Horn Mountains. I have specialized much of my work as a load developer in shotguns and rifles. I have run a small company that builds suppressor barrels of my design and load tests for writing purposes and consulting. My commercial names include Ballistics Research & Development / Metro Gun Systems TM.
Or contact me at:
- Email me at LP@riflegearlab.com
- Follow me on Facebook
- See my website
- Buy my book: Gun Digest Guide to Modern Shotgunning
- Buy my book: The Gun Digest Book of Long-Range Shooting


I’m attempting to zero a ATN, Thor LT, at fifty yards. My main issue is I cannot see the holes in the target at that distance. I even tried to use a “shoot and see” target w/o any luck. Thank you for any avice
You’ll want to use something that shows up easily on the target. Here’s a good video showing a few ideas: https://www.youtube.com/watch?v=9mAmg0D5ArY